Project Price Guide
Here is a guide to help you use the Project Price app. We have aimed to keep simplicity for our users while we handle all of the intricacies. In this walkthrough you'll find out exactly how easy our app is to use. The initial set-up of setting the prices and settings should take around 20 minutes. Once these have been set up, you should only need to revisit or change these if your material prices change or if your working methods change. Remember to save all changes as your input data may be lost.
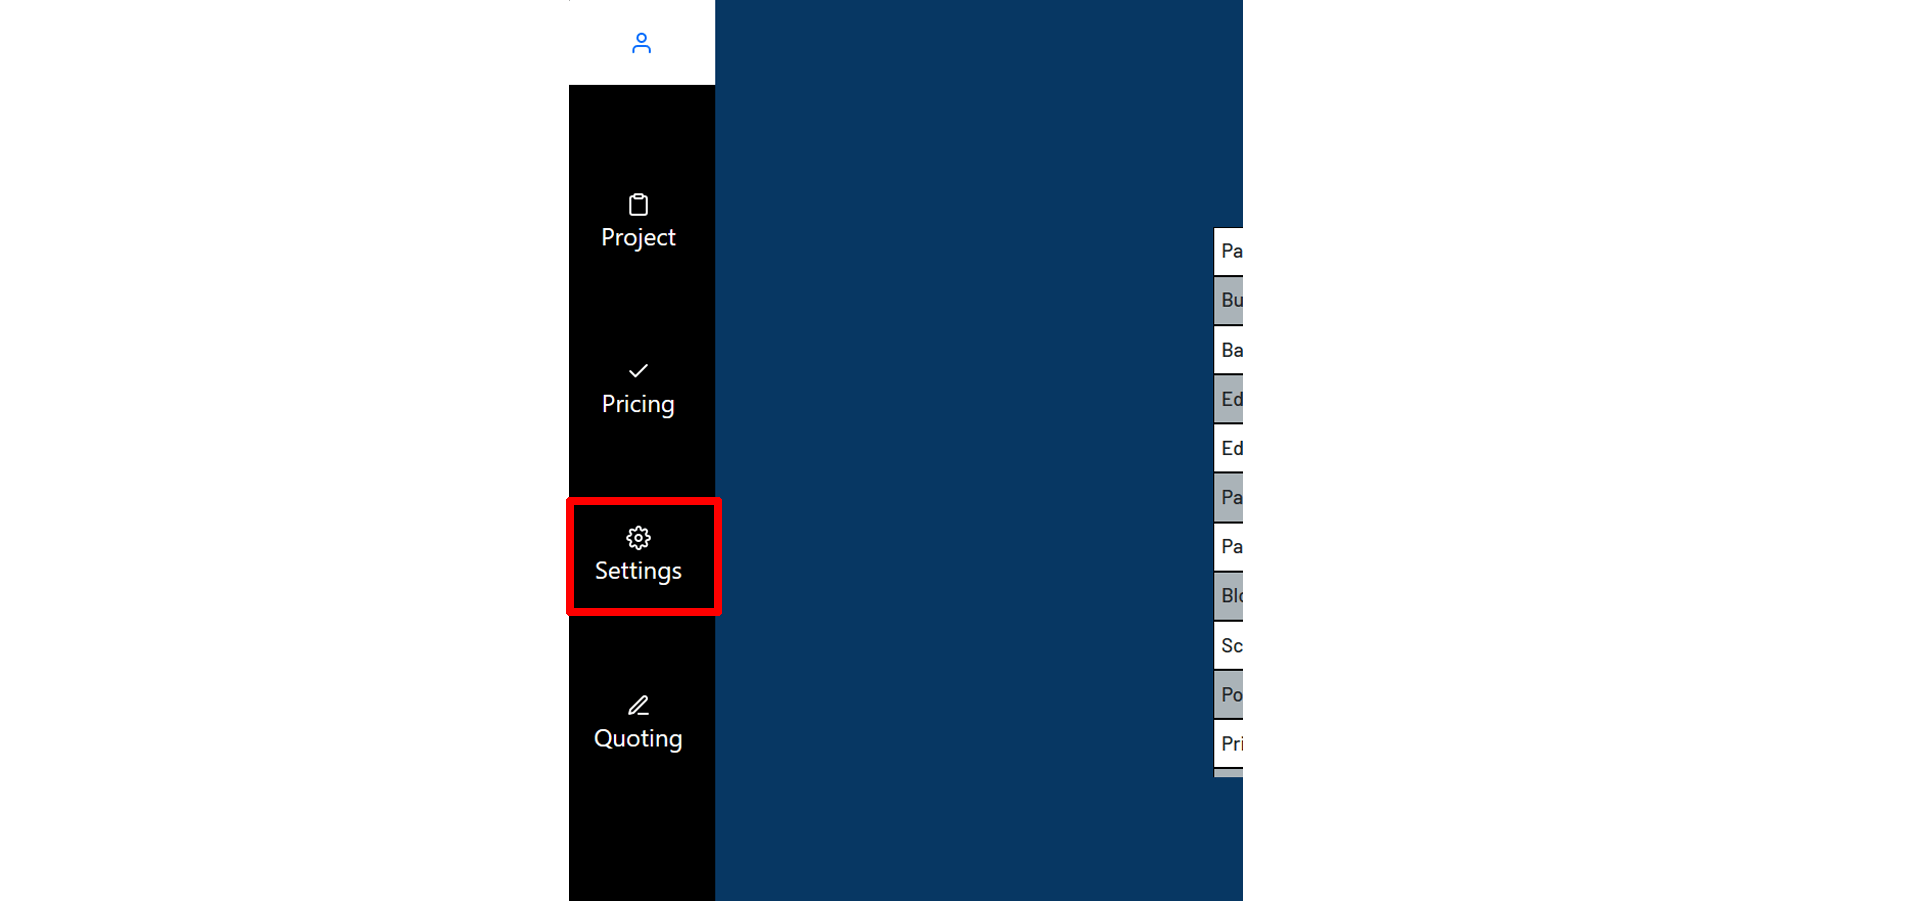
Once you have logged into your account you will need to set up your settings, which can be found in navigation bar on the right of the screen. These settings are how you generally work and the measurements you use, such as excavation depths, sand / cement ratios, pointing coverage, etc.
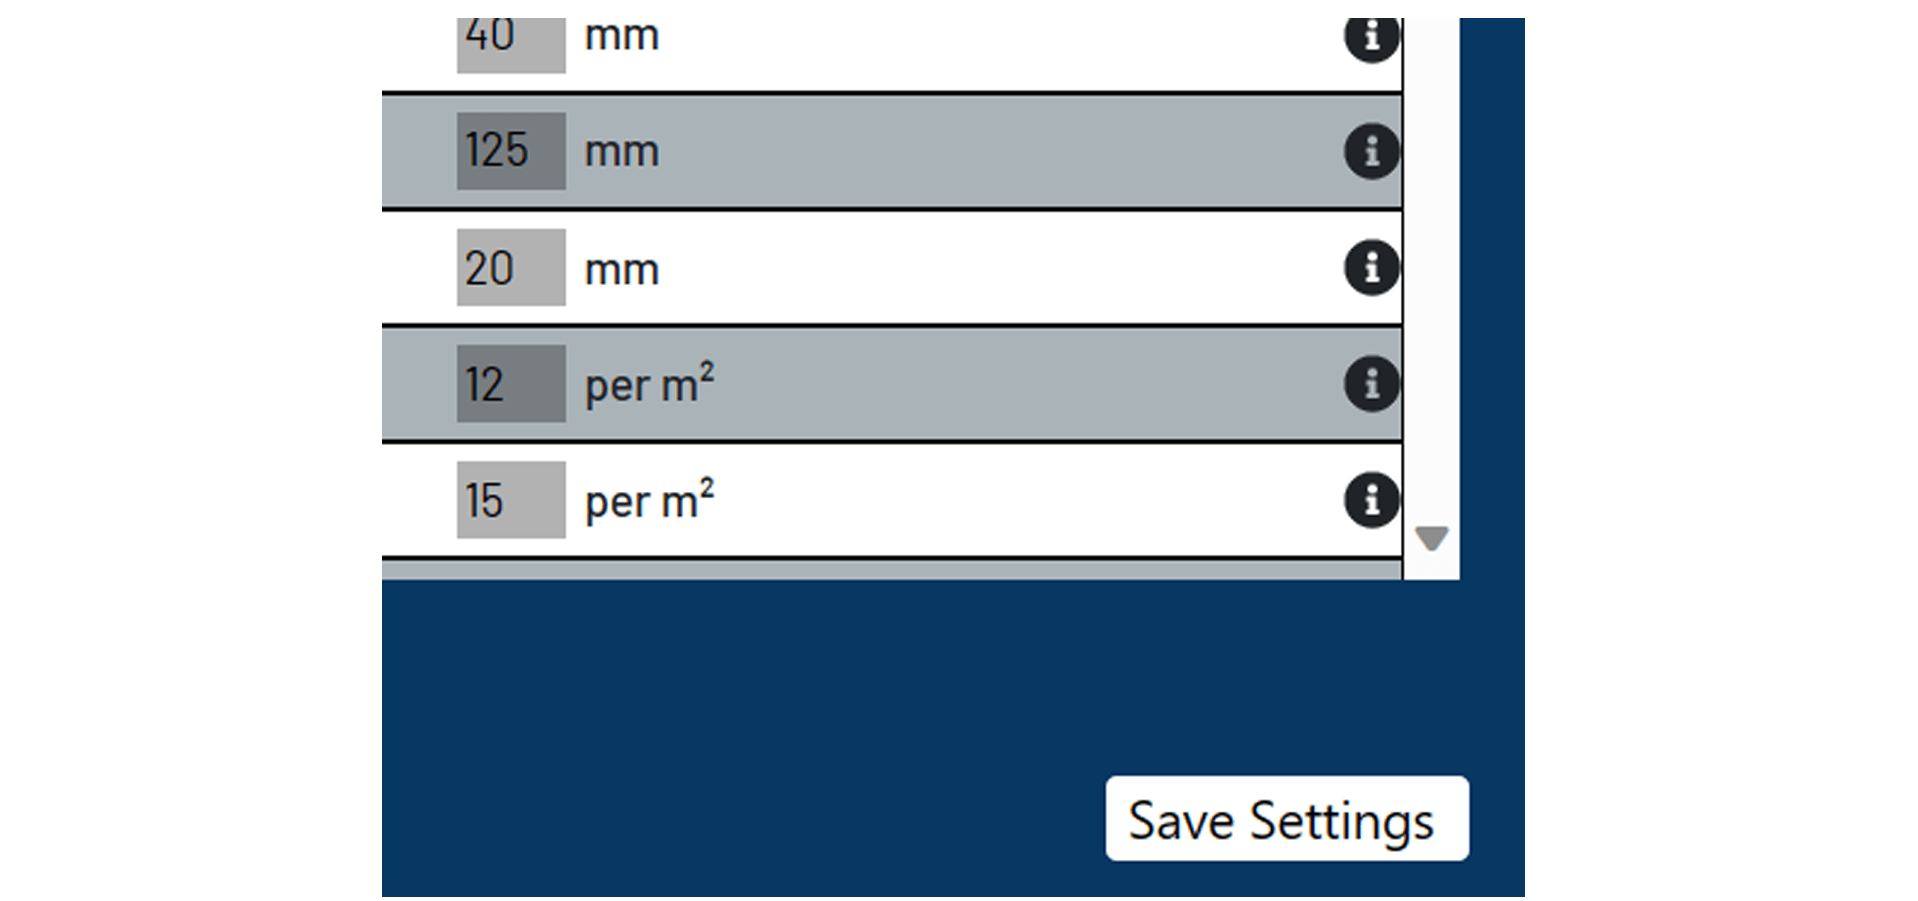
Once you have entered all of your settings, press the save button found under the settings. By default we have entered standard values, if you are to keep these values, you should still press the save settings button to allow the app to use these measurements. You should only ever need to visit the settings menu again, if your working methods change.
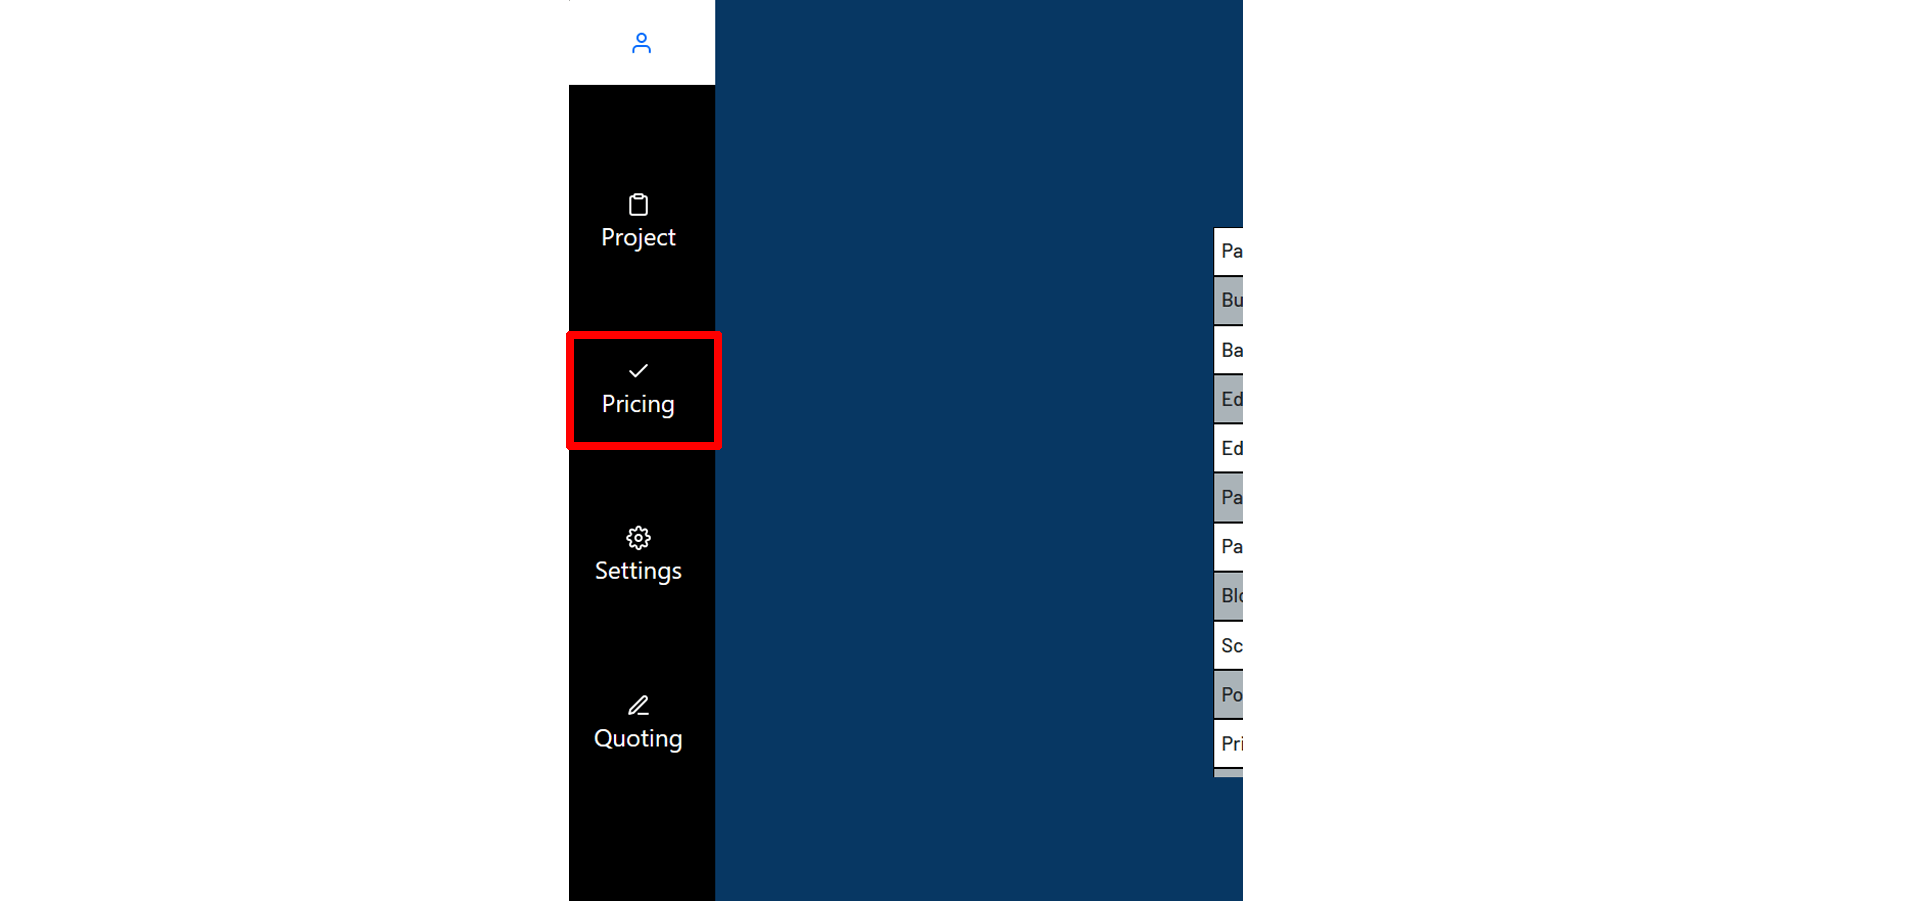
Navigate to the prices tab in the navigation bar and enter your prices for individual materials. Again press the save button to save your prices that will work across board for all of your projects.

Once your prices and settings have been set. Navigate to the Project tab in the navigation bar. At the top of the page you will find a create new project button, first type in the name of your project and press the button, this will allow you to start working on your project.
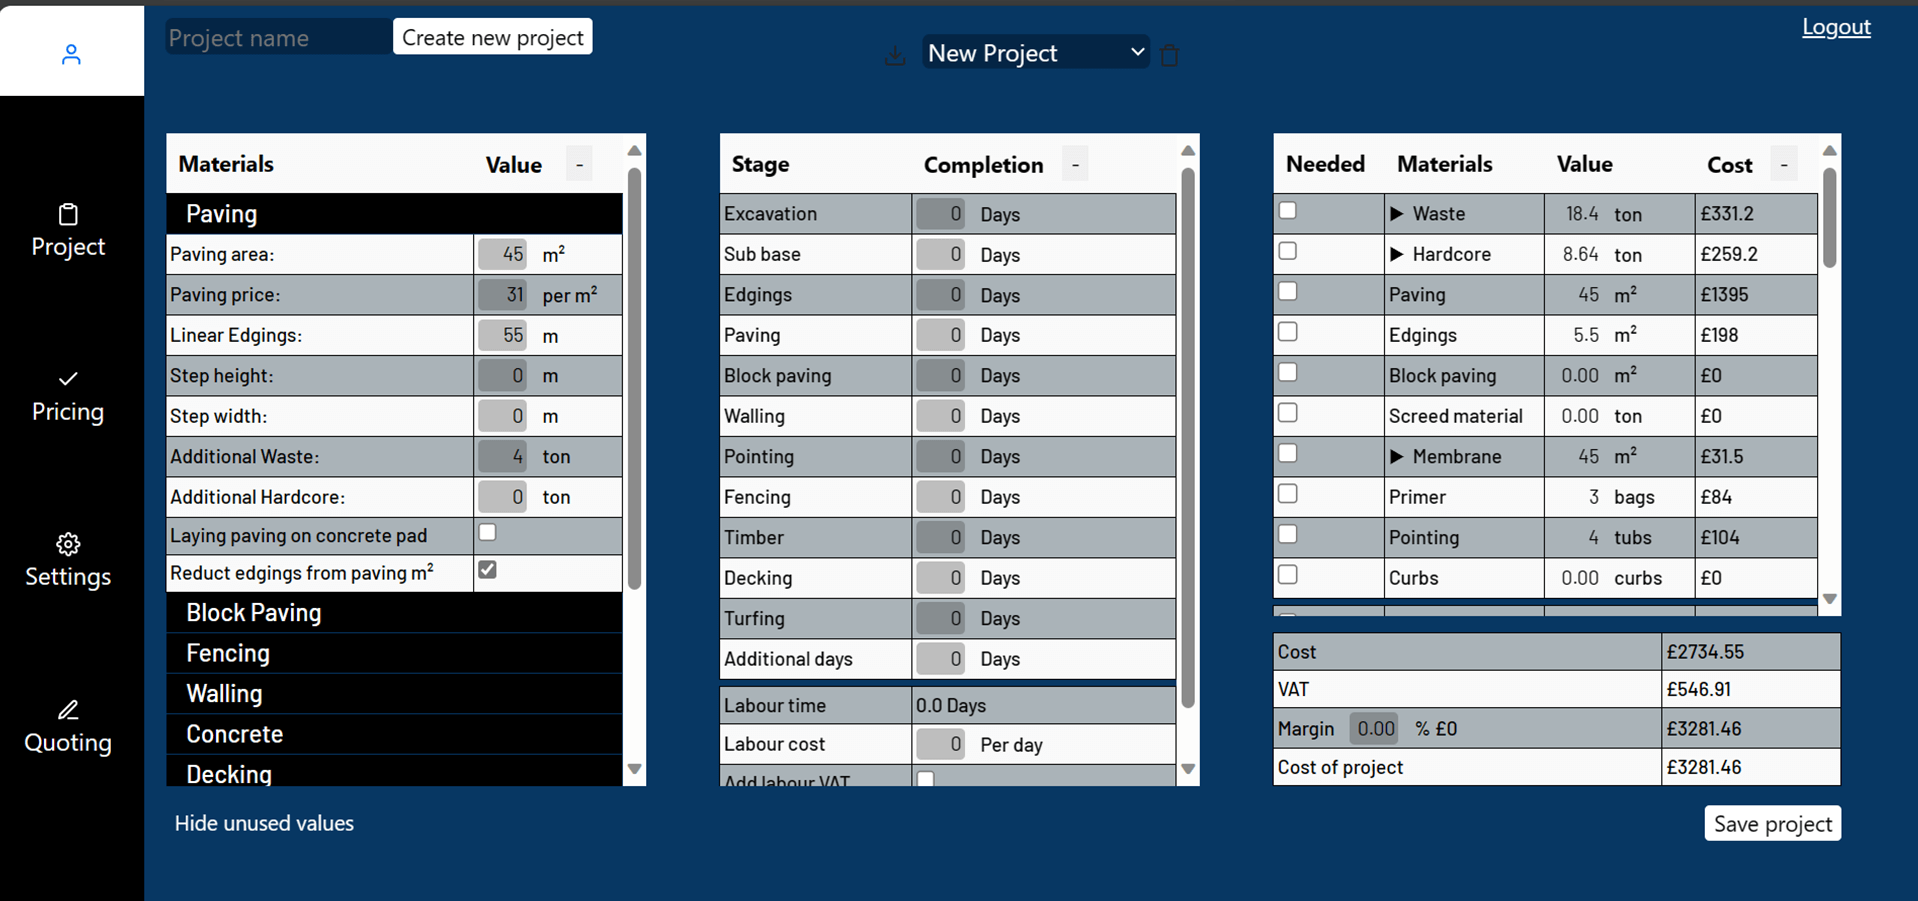
Depending on your requirements, you will find all aspects of hard landscaping in the materials table. Add in your measurements for what your project requires.
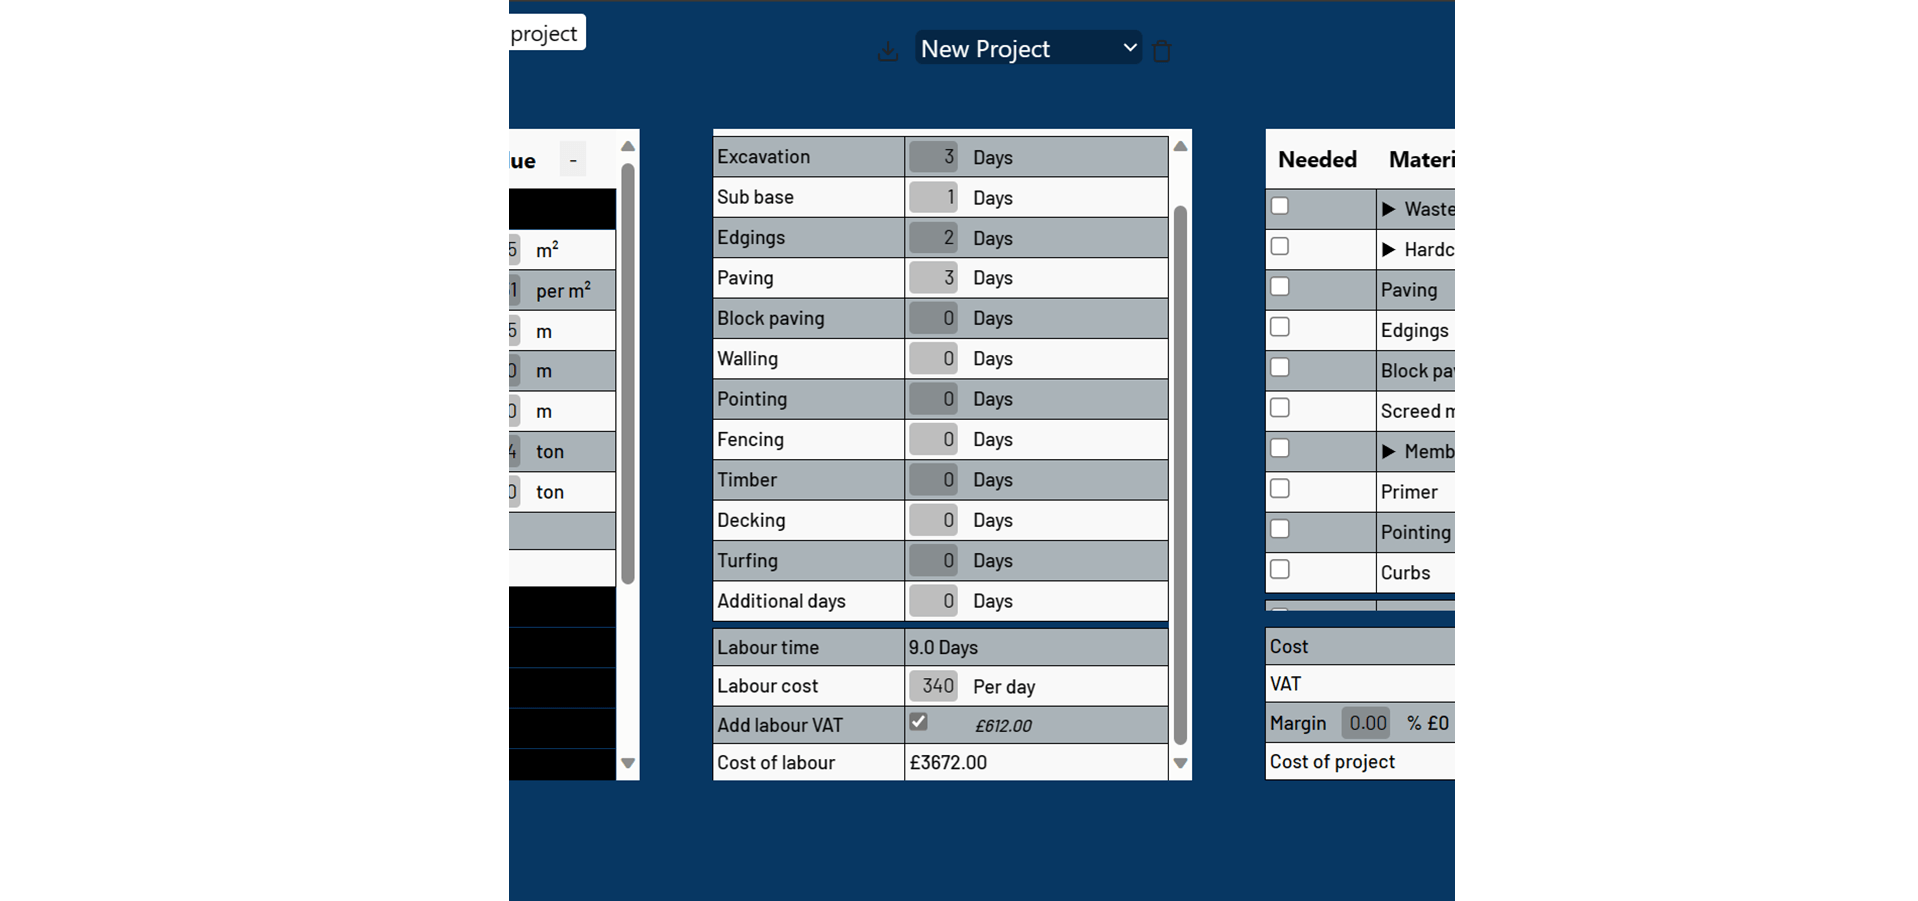
In the middle table, you can add how long each phase should take you to complete. You can also input how much your company charges for labour per day and add VAT if applicable.
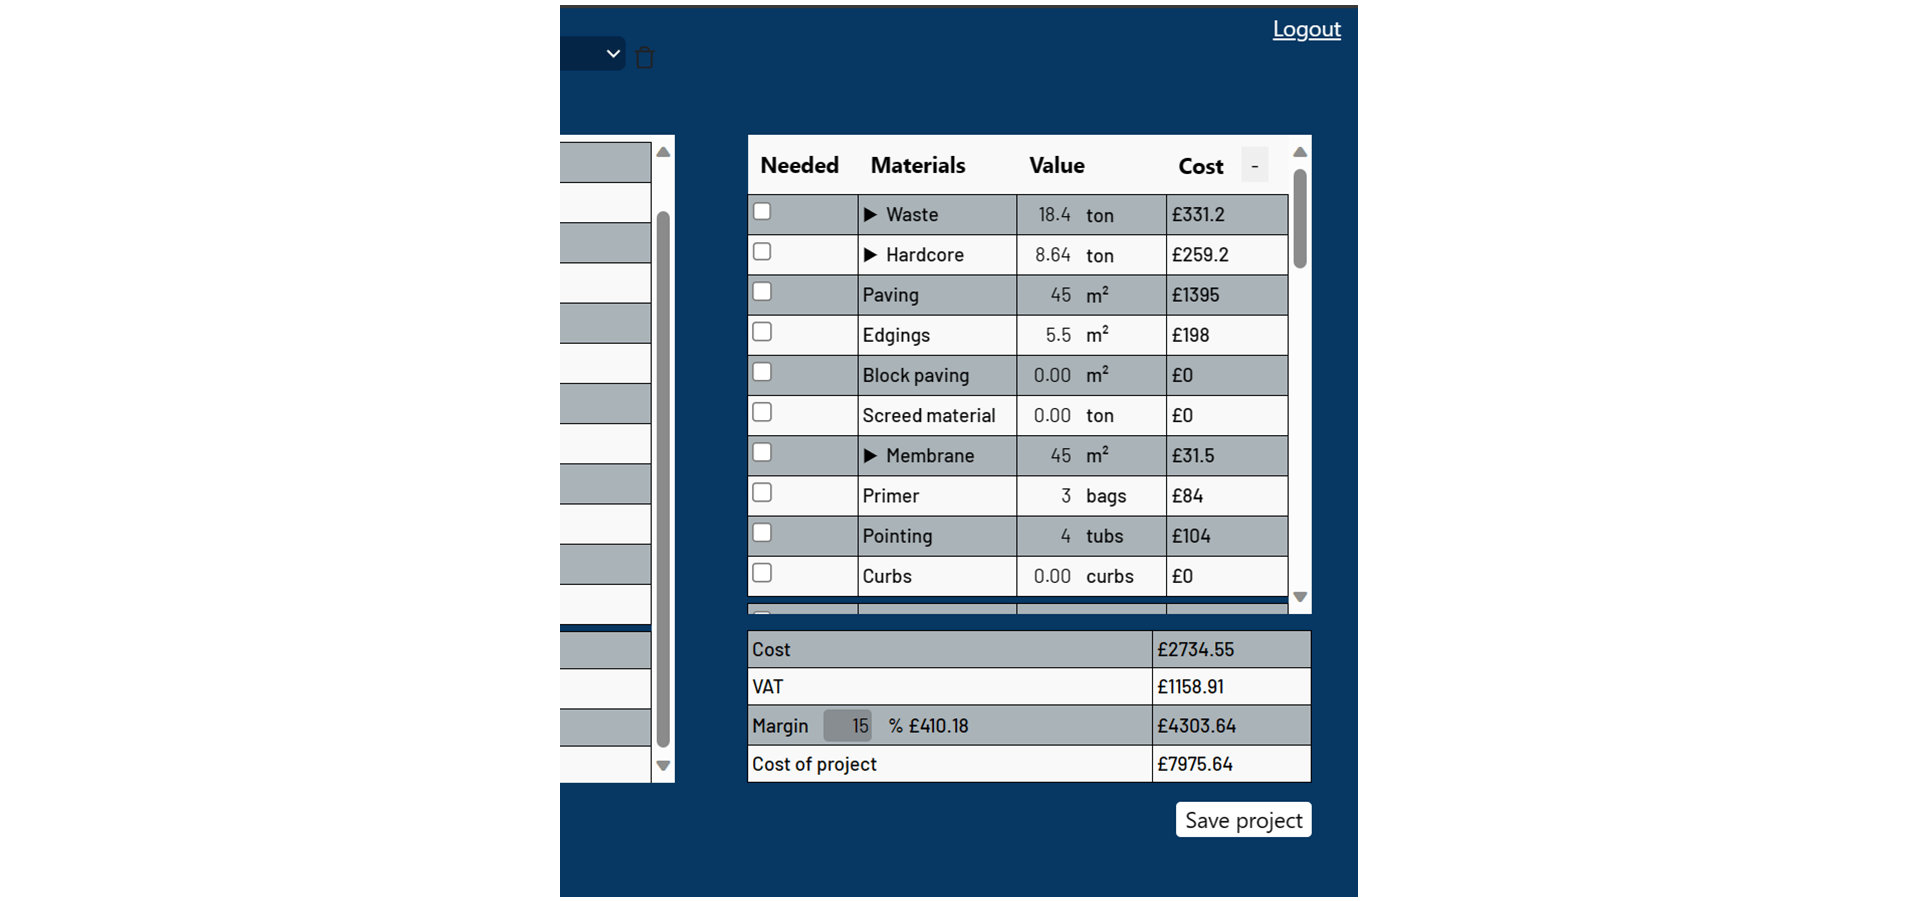
In the table on the far right, you will find all the materials and cost per individual item, you are also able to add on your % margin on top of materials, which will be calculated in your total cost.
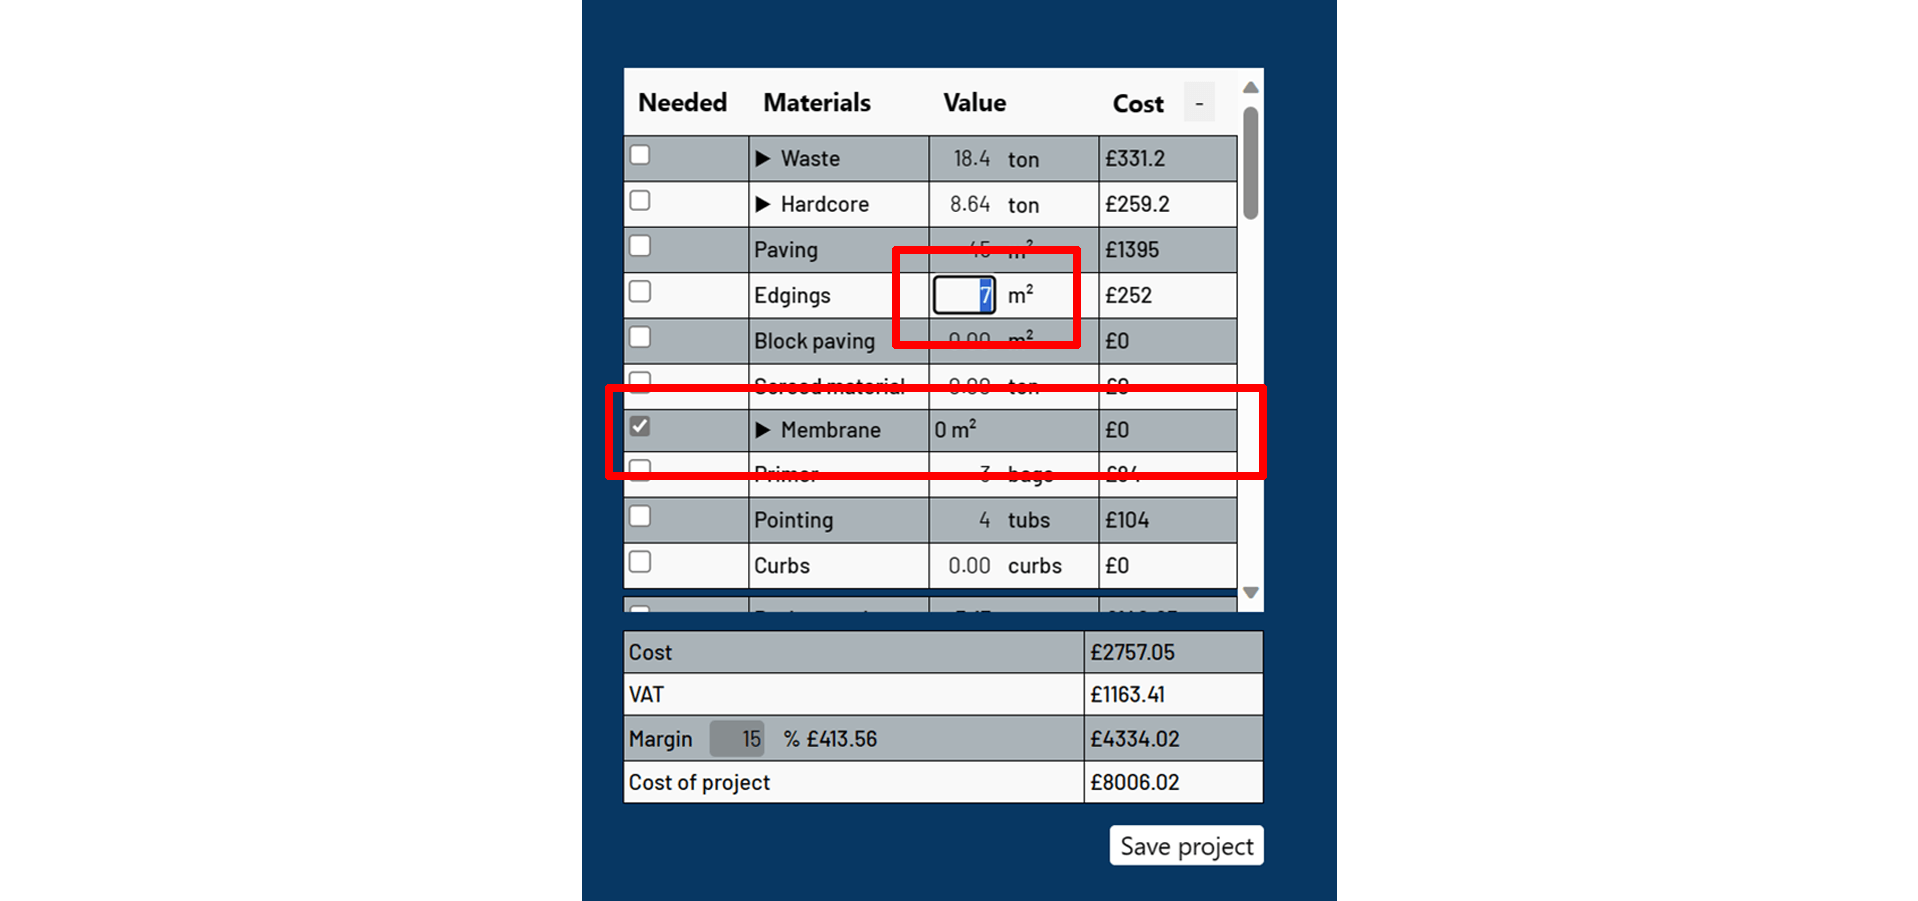
You are able to directly edit the values in the table, adjust these to your needs and the app will remember you new values. If a material is not needed, check the box in the "Needed" column and the value of that material will become 0.
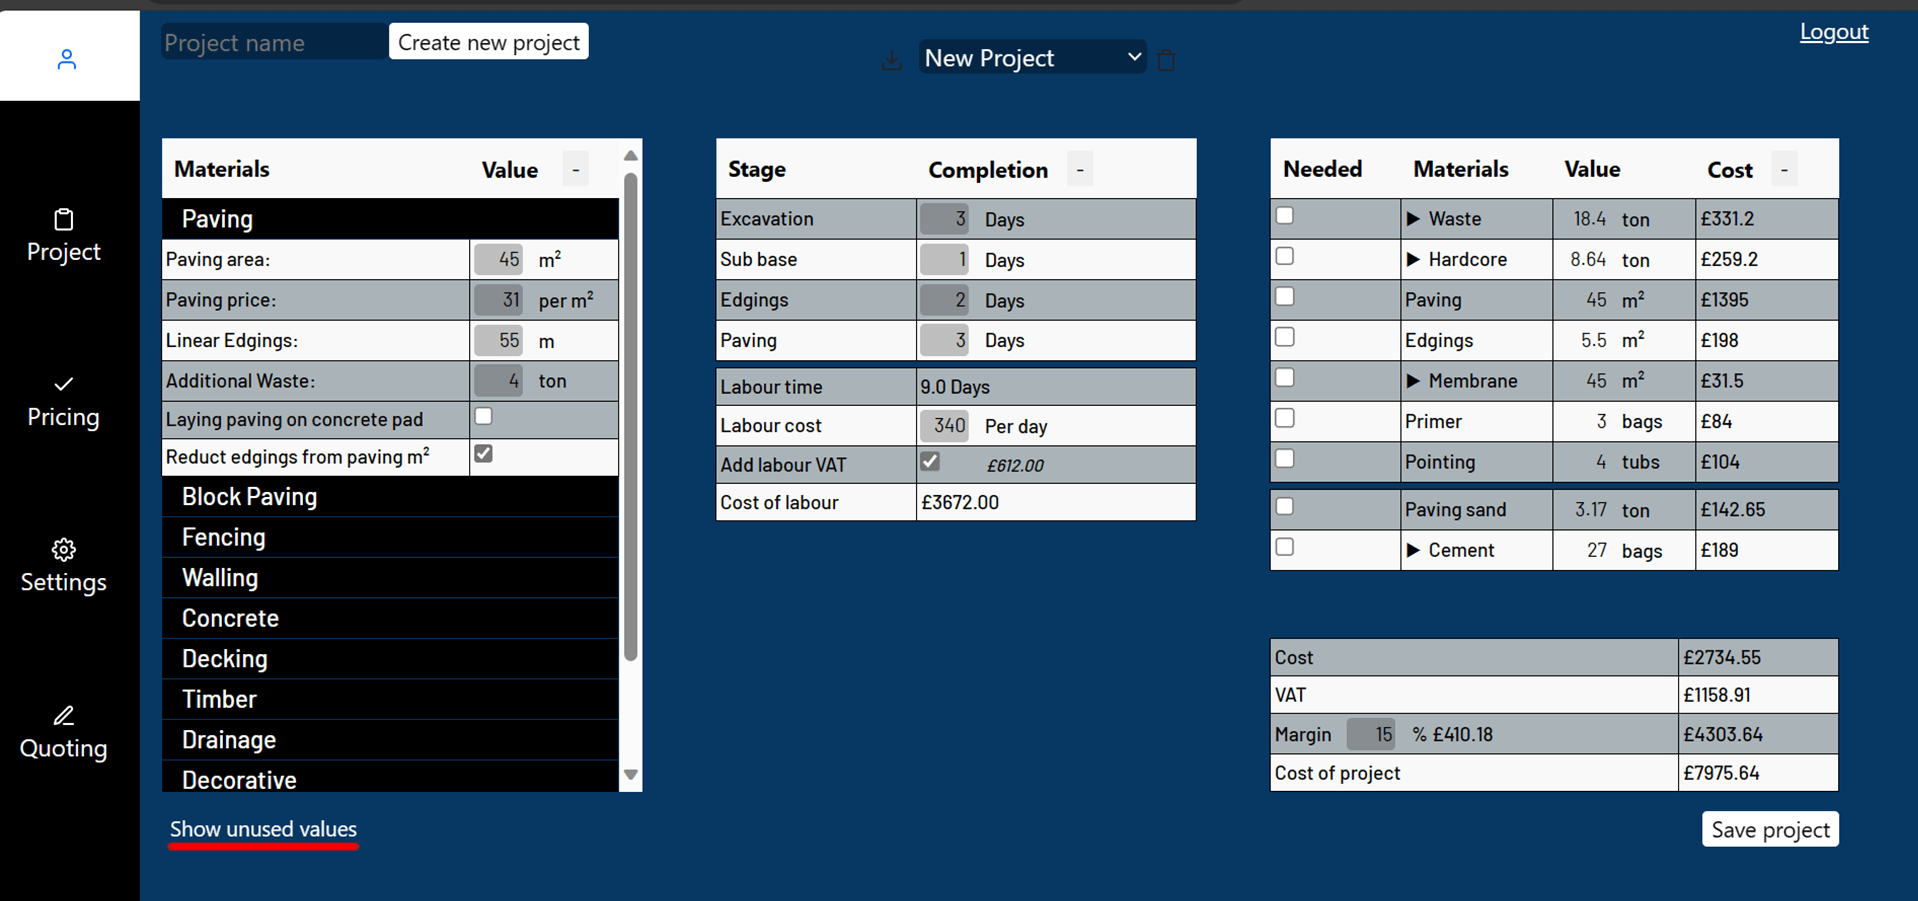
Click the "Hide unused values" button to remove all unused materials and values from view, making it easier to oversee your project.
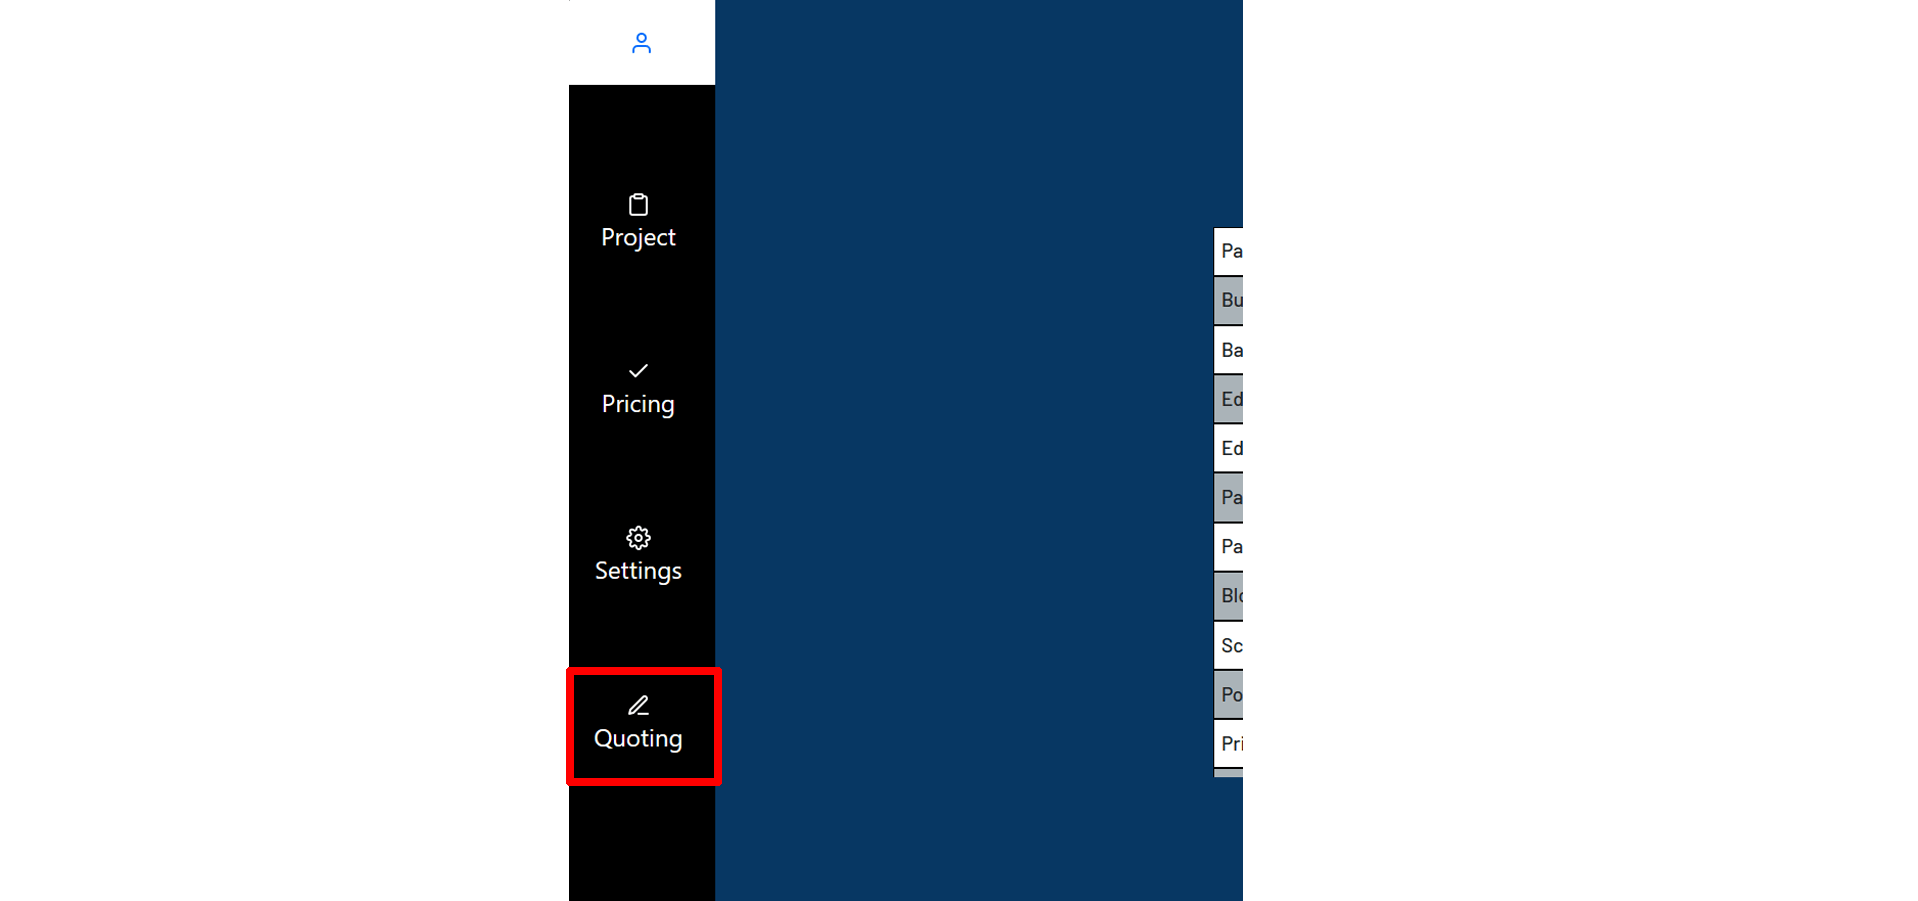
Once you have entered all the necessary measurements, head over to the Quoting tab in the navigation bar.
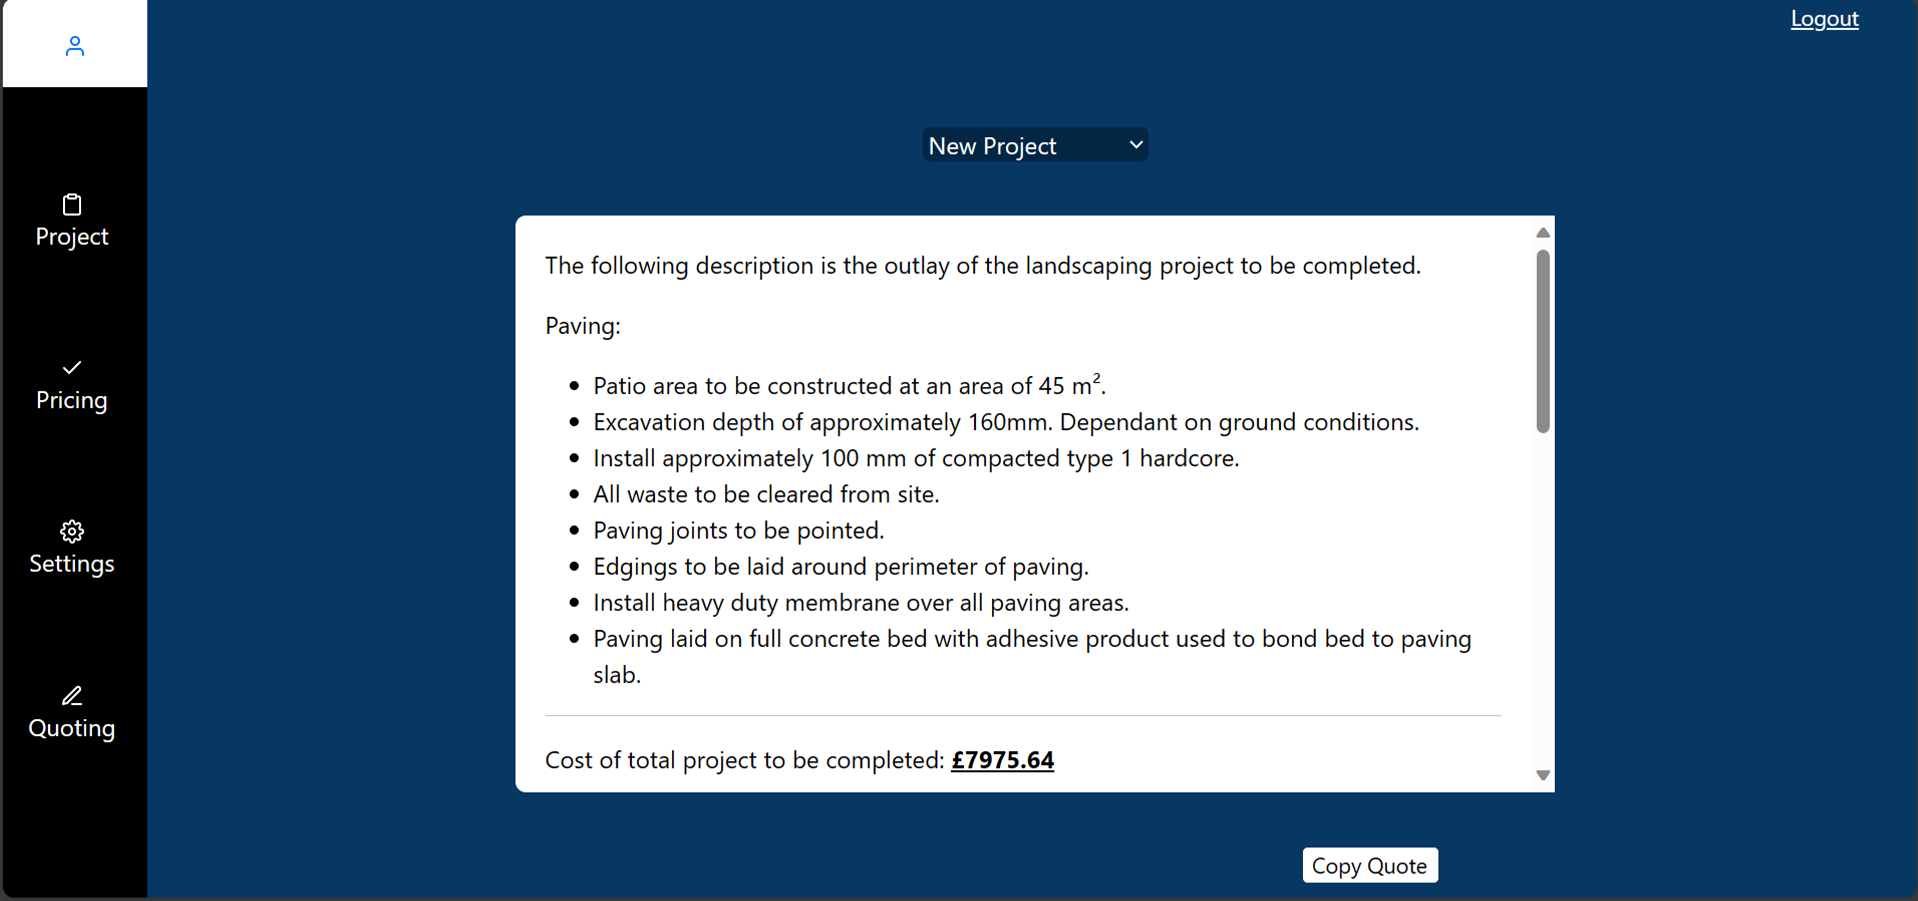
Select your project in the dropdown menu and generate a full custom quote tailored to the information your have entered. Clicking the "Copy quote" button, copies all of the quote to which you can paste it in your usual text editor, to which you can make any edits or send directly to your customer.